임베디드/Arduino
dht11 온도습도
sj0020
2020. 8. 20. 14:31
DHT11 아두이노 온도, 습도 센서 알아보기 / 아두이노 코딩 교육
안녕하세요? 메카솔루션입니다. 오늘은 DHT11의 동작원리 부터 회로도, 소스코드, 그리고 코딩 교육을 ...
blog.naver.com
// Example testing sketch for various DHT humidity/temperature sensors
// Written by ladyada, public domain
// REQUIRES the following Arduino libraries:
// - DHT Sensor Library: https://github.com/adafruit/DHT-sensor-library
// - Adafruit Unified Sensor Lib: https://github.com/adafruit/Adafruit_Sensor
#include "DHT.h"
/*
RXD = 아두이노 2번핀에 연결
TXD = 아두이노 3번핀에 연결
*/
#include <SoftwareSerial.h>
SoftwareSerial BTSerial(3,2);
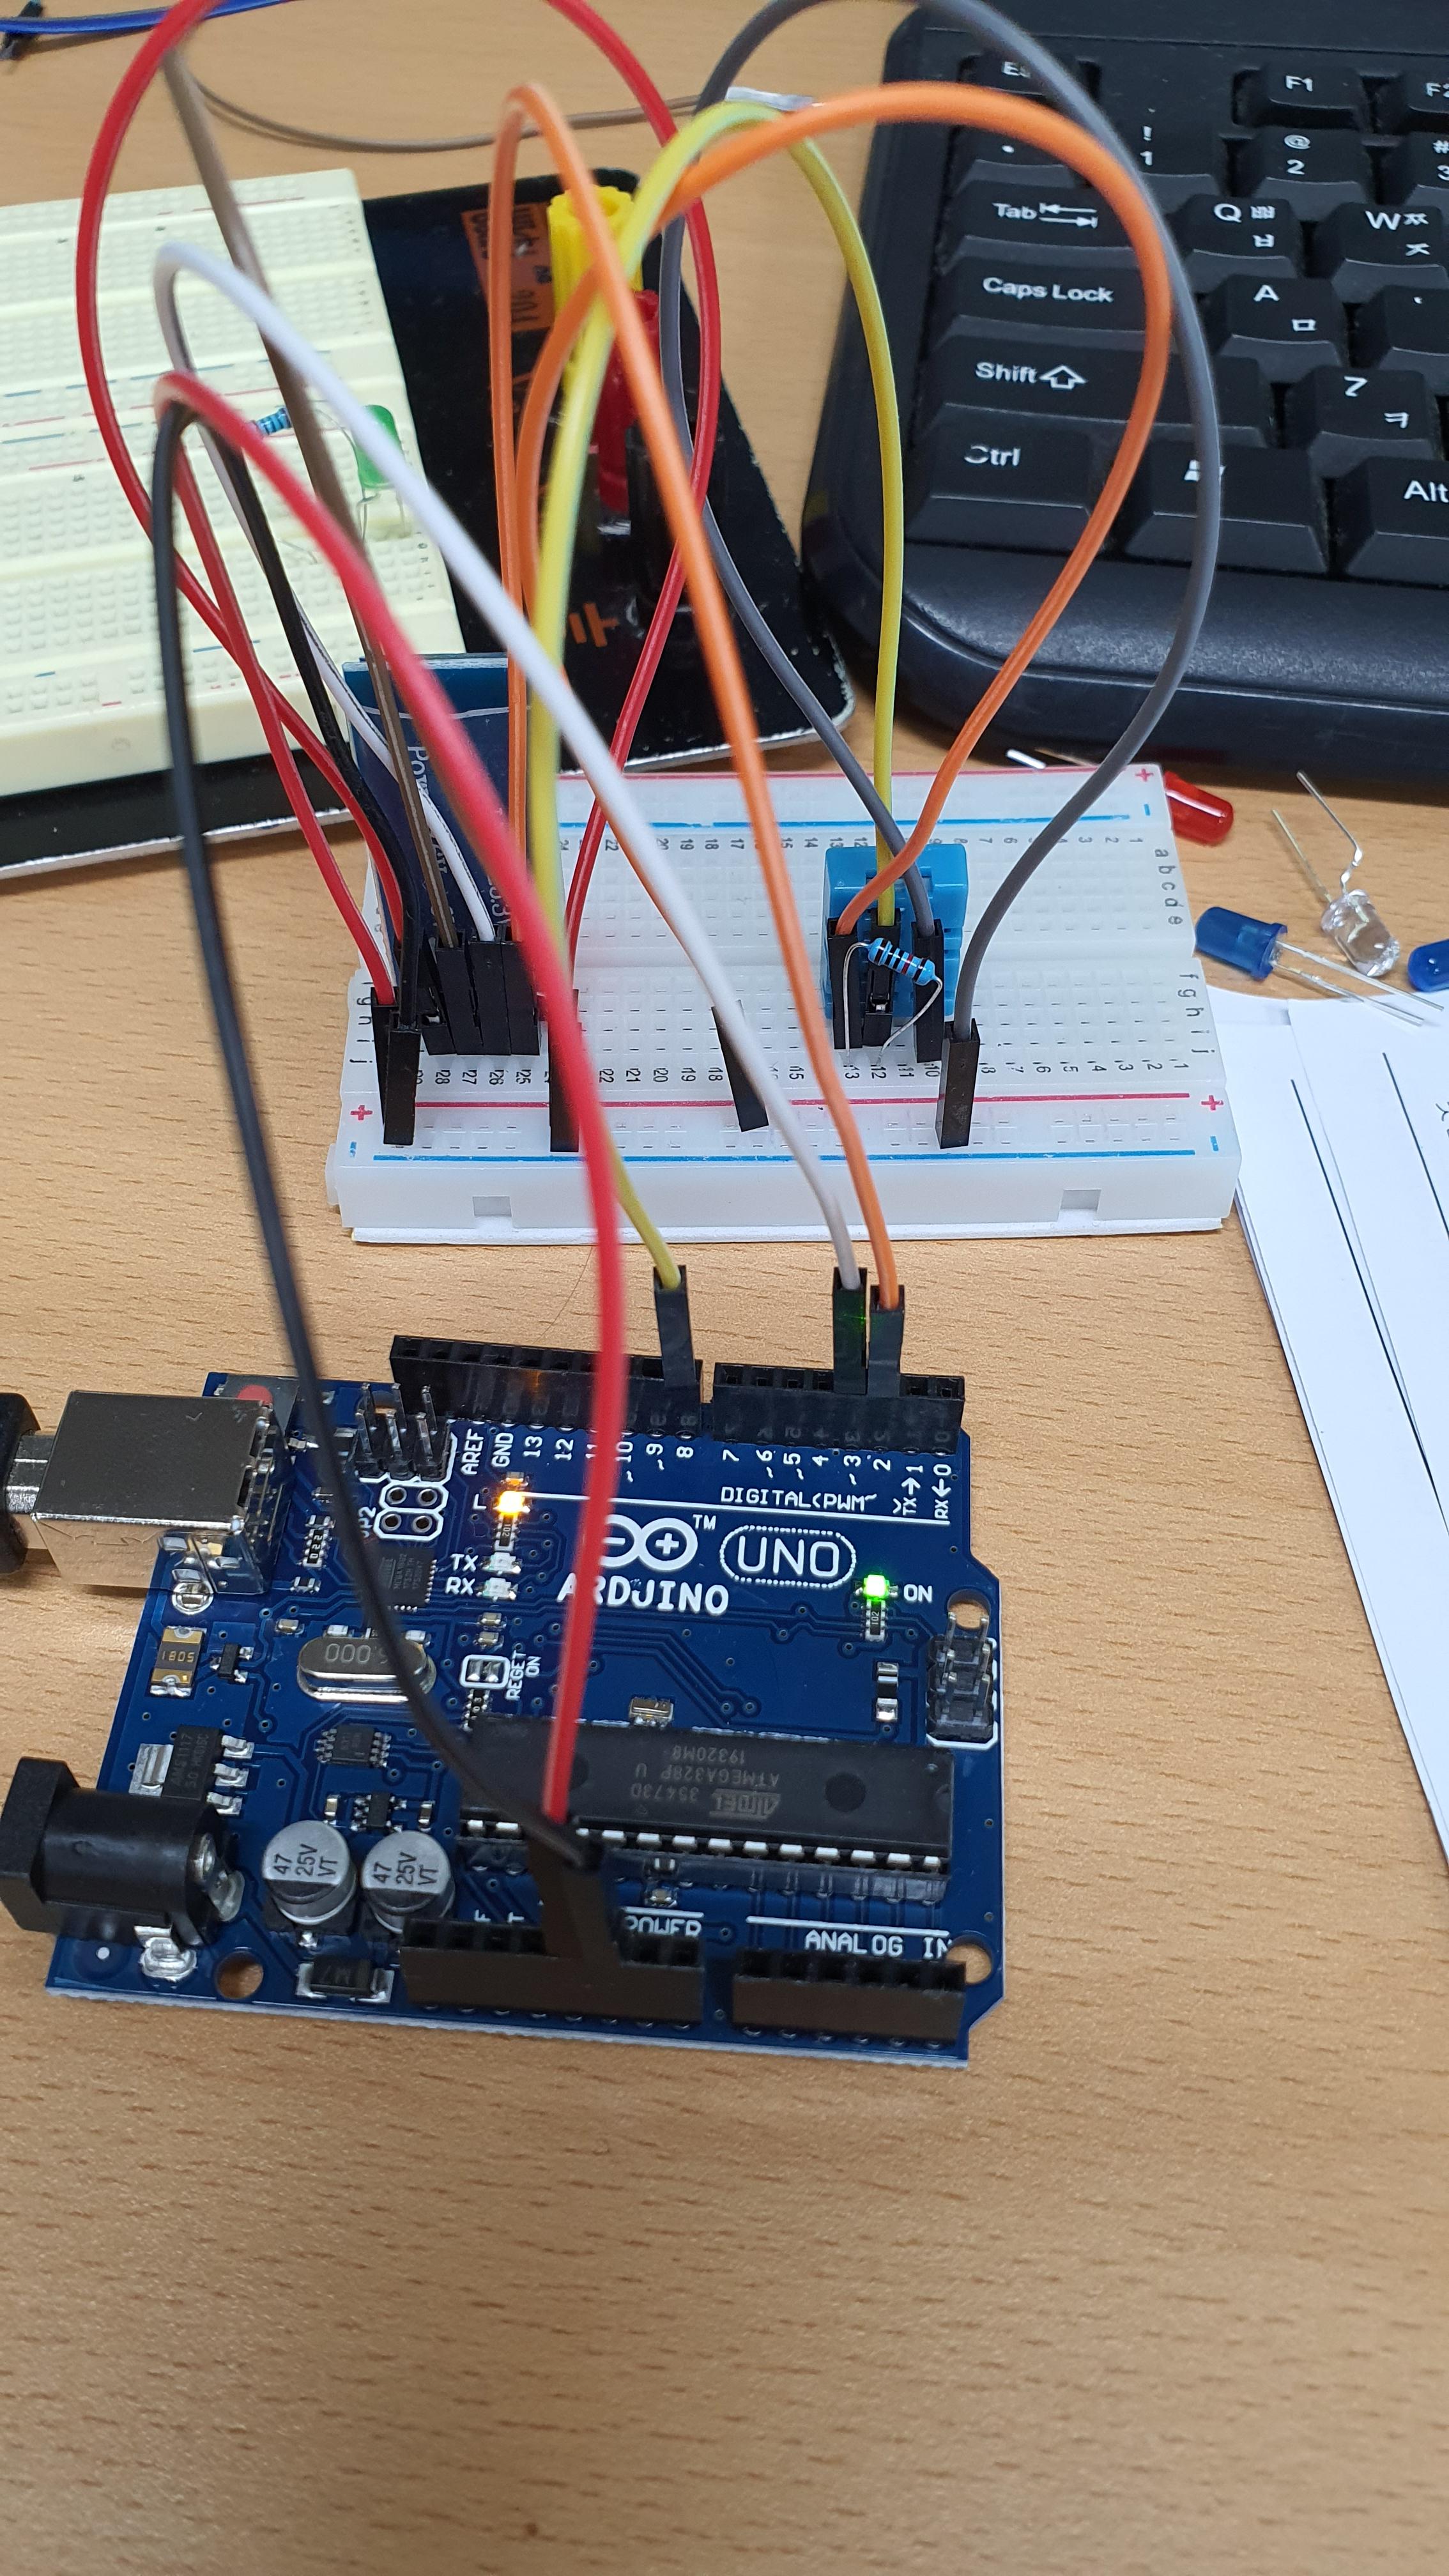
#define DHTPIN 8 // Digital pin connected to the DHT sensor
// Feather HUZZAH ESP8266 note: use pins 3, 4, 5, 12, 13 or 14 --
// Pin 15 can work but DHT must be disconnected during program upload.
// Uncomment whatever type you're using!
#define DHTTYPE DHT11 // DHT 11
//#define DHTTYPE DHT22 // DHT 22 (AM2302), AM2321
//#define DHTTYPE DHT21 // DHT 21 (AM2301)
// Connect pin 1 (on the left) of the sensor to +5V
// NOTE: If using a board with 3.3V logic like an Arduino Due connect pin 1
// to 3.3V instead of 5V!
// Connect pin 2 of the sensor to whatever your DHTPIN is
// Connect pin 4 (on the right) of the sensor to GROUND
// Connect a 10K resistor from pin 2 (data) to pin 1 (power) of the sensor
// Initialize DHT sensor.
// Note that older versions of this library took an optional third parameter to
// tweak the timings for faster processors. This parameter is no longer needed
// as the current DHT reading algorithm adjusts itself to work on faster procs.
DHT dht(DHTPIN, DHTTYPE);
void setup() {
Serial.begin(9600); //HW Serial.
BTSerial.begin(9600); //SW Serial.
Serial.println(F("DHTxx test!"));
dht.begin();
}
void loop() {
// Wait a few seconds between measurements.
delay(2000);
// Reading temperature or humidity takes about 250 milliseconds!
// Sensor readings may also be up to 2 seconds 'old' (its a very slow sensor)
float h = dht.readHumidity();
// Read temperature as Celsius (the default)
float t = dht.readTemperature();
// Read temperature as Fahrenheit (isFahrenheit = true)
float f = dht.readTemperature(true);
// Check if any reads failed and exit early (to try again). 넣는 이유: 안넣으면 값을 안 읽어 올 때 무슨 이유때문에 안읽어 오는지 모른다
if (isnan(h) || isnan(t) || isnan(f)) {
Serial.println(F("Failed to read from DHT sensor!"));
return;
}
// Compute heat index in Fahrenheit (the default)
float hif = dht.computeHeatIndex(f, h);
// Compute heat index in Celsius (isFahreheit = false)
float hic = dht.computeHeatIndex(t, h, false);
Serial.print(F("Humidity: "));
Serial.print(h);
Serial.print(F("% Temperature: "));
Serial.print(t);
Serial.print(F("°C "));
Serial.print(f);
Serial.print(F("°F Heat index: "));
Serial.print(hic);
Serial.print(F("°C "));
Serial.print(hif);
Serial.println(F("°F"));
// BT 전송.
if (Serial.available()) {
BTSerial.print(F("Humidity: "));
BTSerial.print(h);
BTSerial.print(F("% Temperature: "));
BTSerial.print(t);
BTSerial.print(F("°C "));
BTSerial.print(f);
BTSerial.print(F("°F Heat index: "));
BTSerial.print(hic);
BTSerial.print(F("°C "));
BTSerial.print(hif);
BTSerial.println(F("°F"));
}
}if (Serial.available()) 의미:
시리얼 모니터 창에서 데이터를 입력시켰을 때.
if문 돌려면 시리얼모니터 창에 데이터 입력 시켜야 돌기 시작함.
// Example testing sketch for various DHT humidity/temperature sensors
// Written by ladyada, public domain

// REQUIRES the following Arduino libraries:
// - DHT Sensor Library: https://github.com/adafruit/DHT-sensor-library
// - Adafruit Unified Sensor Lib: https://github.com/adafruit/Adafruit_Sensor

#include "DHT.h"

#define DHTPIN 8     // Digital pin connected to the DHT sensor
// Feather HUZZAH ESP8266 note: use pins 3, 4, 5, 12, 13 or 14 --
// Pin 15 can work but DHT must be disconnected during program upload.

// Uncomment whatever type you're using!
#define DHTTYPE DHT11   // DHT 11
//#define DHTTYPE DHT22   // DHT 22  (AM2302), AM2321
//#define DHTTYPE DHT21   // DHT 21 (AM2301)

// Connect pin 1 (on the left) of the sensor to +5V
// NOTE: If using a board with 3.3V logic like an Arduino Due connect pin 1
// to 3.3V instead of 5V!
// Connect pin 2 of the sensor to whatever your DHTPIN is
// Connect pin 4 (on the right) of the sensor to GROUND
// Connect a 10K resistor from pin 2 (data) to pin 1 (power) of the sensor

// Initialize DHT sensor.
// Note that older versions of this library took an optional third parameter to
// tweak the timings for faster processors.  This parameter is no longer needed
// as the current DHT reading algorithm adjusts itself to work on faster procs.
DHT dht(DHTPIN, DHTTYPE);

void setup() {
  Serial.begin(9600);
  Serial.println(F("DHTxx test!"));

  dht.begin();
}

void loop() {
  // Wait a few seconds between measurements.
  delay(2000);

  // Reading temperature or humidity takes about 250 milliseconds!
  // Sensor readings may also be up to 2 seconds 'old' (its a very slow sensor)
  float h = dht.readHumidity();
  // Read temperature as Celsius (the default)
  float t = dht.readTemperature();
  // Read temperature as Fahrenheit (isFahrenheit = true)
  float f = dht.readTemperature(true);

  // Check if any reads failed and exit early (to try again).
  if (isnan(h) || isnan(t) || isnan(f)) {
    Serial.println(F("Failed to read from DHT sensor!"));
    return;
  }

  // Compute heat index in Fahrenheit (the default)
  float hif = dht.computeHeatIndex(f, h);
  // Compute heat index in Celsius (isFahreheit = false)
  float hic = dht.computeHeatIndex(t, h, false);

  Serial.print(F("Humidity: "));
  Serial.print(h);
  Serial.print(F("%  Temperature: "));
  Serial.print(t);
  Serial.print(F("°C "));
  Serial.print(f);
  Serial.print(F("°F  Heat index: "));
  Serial.print(hic);
  Serial.print(F("°C "));
  Serial.print(hif);
  Serial.println(F("°F"));
}
https://blog.naver.com/eduino/222065638314
아두이노 온습도 모듈(케이블 포함) DHT-11 / Arduino Sensor
▶ 온습도 모듈이란 정전식 습도센서와 서미스터 (thermistor) 를 사용하여 대기온도와 습도를 측정하...
blog.naver.com
https://blog.naver.com/microfun/221815117502
MFK_057 : 아두이노 블루투스 통신 3 (안드로이드에 DHT11데이터를 전송하기)
안녕하세요 마이크로펀 입니다.이번 글은 MFK_057키트입니다.1. 이름 : MFK_057키트 아두이노 블...
blog.naver.com
저항 = 5.1KΩ 권장. 10k 병렬로 연결하면 됨